This sloth plushie project was written Lynne Sharpe from The Make It Room. Lynne teaches dressmaking and craft classes in Chelmsford, Essex and sells a range of patterns, including other adorable soft toy patterns.
The fleece fabrics and toy stuffing were provided by Pound Fabrics, they are an online store selling a range of low cost fabrics from just £1 a metre!
Supplies
Fleece in three colours – We used polar fleece from Pound Fabrics in beige, rust and mustard
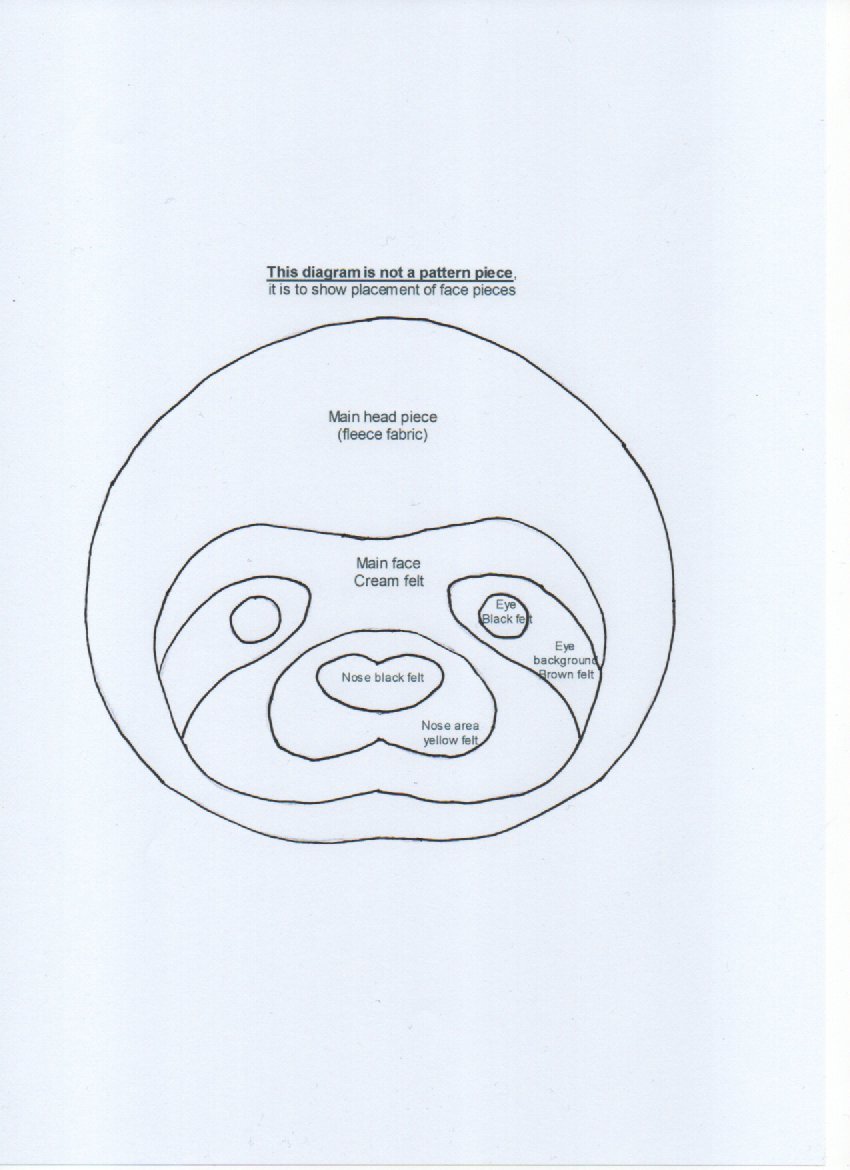
Place the felt pieces on one of the head pieces as shown in the picture above left or on the sloth face piece placement sheet which can be downloaded above with the other pattern sheets.
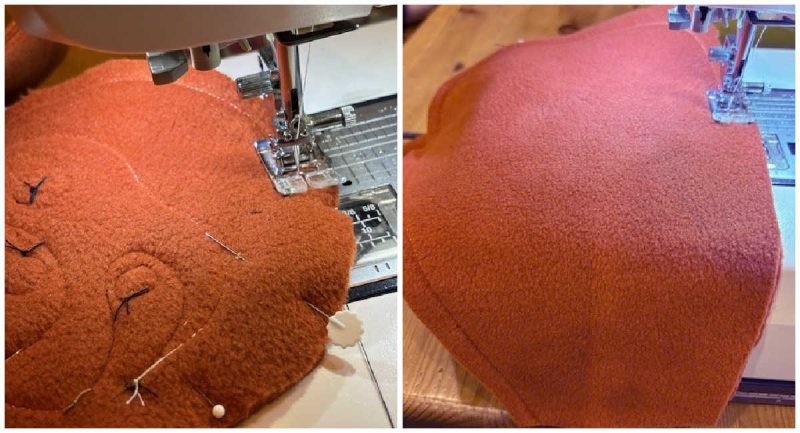
Pin in place and machine around the edges of each section, we have changed colours to coordinate with the felt pieces. Pull all ends through to the back and tie off.
Place the head pieces right sides together, pin and machine with a 1 cm/ ⅜ inch seam leaving the neck open. Repeat with the two body sections, leaving the neck open. Turn out to the right side.
Fill the head with toy stuffing leaving the neck a little unstuffed, fill the body with stuffing to the top. Place the neck inside the head opening, pin to hold and then fold the edge in and stitch around with a needle and thread as shown above.
Make the arms and legs – fold each piece in half right sides together, leaving the top of each limb and each foot open. Sew then turn to the right side and fill with stuffing as shown above.
Place the arms at the top of the body aligned with the neck edge as shown above left, turn upper edge of the upper arm in, stitch in place by hand through the centre (enough to hold in position), then sew buttons through from one shoulder to the other using a long doll needle. This will mean that the arm will turn.
Repeat with the legs at the bottom edges, we have pulled the bottom of the body in slightly when stitching. Place buttons here through the centre of the hip/top of leg and the limbs will move.
Make the four sets of fingers by top stitching together on the sewing machine and then trimming so that the edges are even, place a tiny amount of stuffing inside. Insert one set into the bottom of each limb, pin and top stitch in place as shown above right.
To finish we have stitched poppers to the inside of the feet and hands so that the sloth can be hung from a branch!